
This guide is for anyone facing a dusty job at home and wanting to keep the dust where the work is, rather than spread through the rest of the house. That might be sanding floors, skimming or patching plaster, cutting tile, timber or MDF, fitting a kitchen or bathroom, or a full room renovation. Set a barrier up well and you spend far less time cleaning, you protect the rooms and people beyond the work area, and you can carry on using the rest of the house while the job runs. The aim is to make the choice a confident one, so you pick the ZipWall dust protection setup that suits your job and put it up properly the first time.
Why dust control matters
Dust from building and DIY work is more than a cleaning nuisance. HSE's construction dust guidance, CIS36, explains that the fine dust from everyday jobs can harm the lungs and airways, and that the main dust-related diseases affecting construction workers are lung cancer, silicosis, chronic obstructive pulmonary disease and asthma. It groups the dust into three types: silica dust from concrete, mortar and sandstone, wood dust from softwood, hardwood, MDF and plywood, and general dust from materials such as gypsum plasterboard. HSE notes that most of these diseases develop slowly, with the damage often not obvious until it is already serious, and that over 500 construction workers are believed to die from silica dust exposure each year. The same dust is created by common home jobs like sanding, cutting and skimming.
A dust barrier plays one specific part in this. It contains and separates the dust, keeping it in the work area and away from the people and rooms beyond. Under HSE's approach the first step is to stop dust at the source with the right materials and methods, then control what remains with water suppression or on-tool extraction, with respiratory protection as the last line. A barrier works alongside those controls rather than in place of them, so the sensible way to think about ZipWall is as the part that protects the rest of the house while you deal with the dust at the workface.

Types of dust protection
The ZipWall range is a system of parts that work together. You can use one piece on its own, such as a zip door across a single opening, or combine poles, barrier material and seals into a full floor-to-ceiling wall. These are the building blocks.
Zip doors
A ready-made plastic door that covers an existing doorway you still need to walk through. A built-in zipper lets you step in and out while the opening stays closed the rest of the time. The quickest way to seal a single door.
Spring-loaded poles
Telescopic poles that hold a barrier up between floor and ceiling. A spring keeps constant tension so the pole jams itself tight with no fixings, no tape and no ladder, and comes down again in seconds without marking the surfaces.
Barrier material
The sheet that forms the wall itself, hung from the poles. You can use reusable ZipFast panels or ordinary plastic sheeting, depending on how often you expect to use it and how dirty the job is.
Tapeless sealing
FoamRail seals and SidePack wall mounts close the gaps along the walls, ceiling and floor without tape. They give a tighter barrier where dust would otherwise escape at the edges, and leave no marks behind.
Add-on zippers
Self-adhesive heavy-duty zippers that stick to plastic sheeting and create an entry in seconds. Two of them make a hands-free door, and a built-in cutter trims the plastic cleanly so the zipper does not jam.
The complete toolkit
A single kit with poles, seals, a zip door, reusable panels, zippers and carry bags, enough to build and seal a barrier on all four sides. The choice when you want one box that handles almost any job.
How to plan your barrier
A few measurements and decisions before you buy will tell you exactly what you need. Work through these in order.
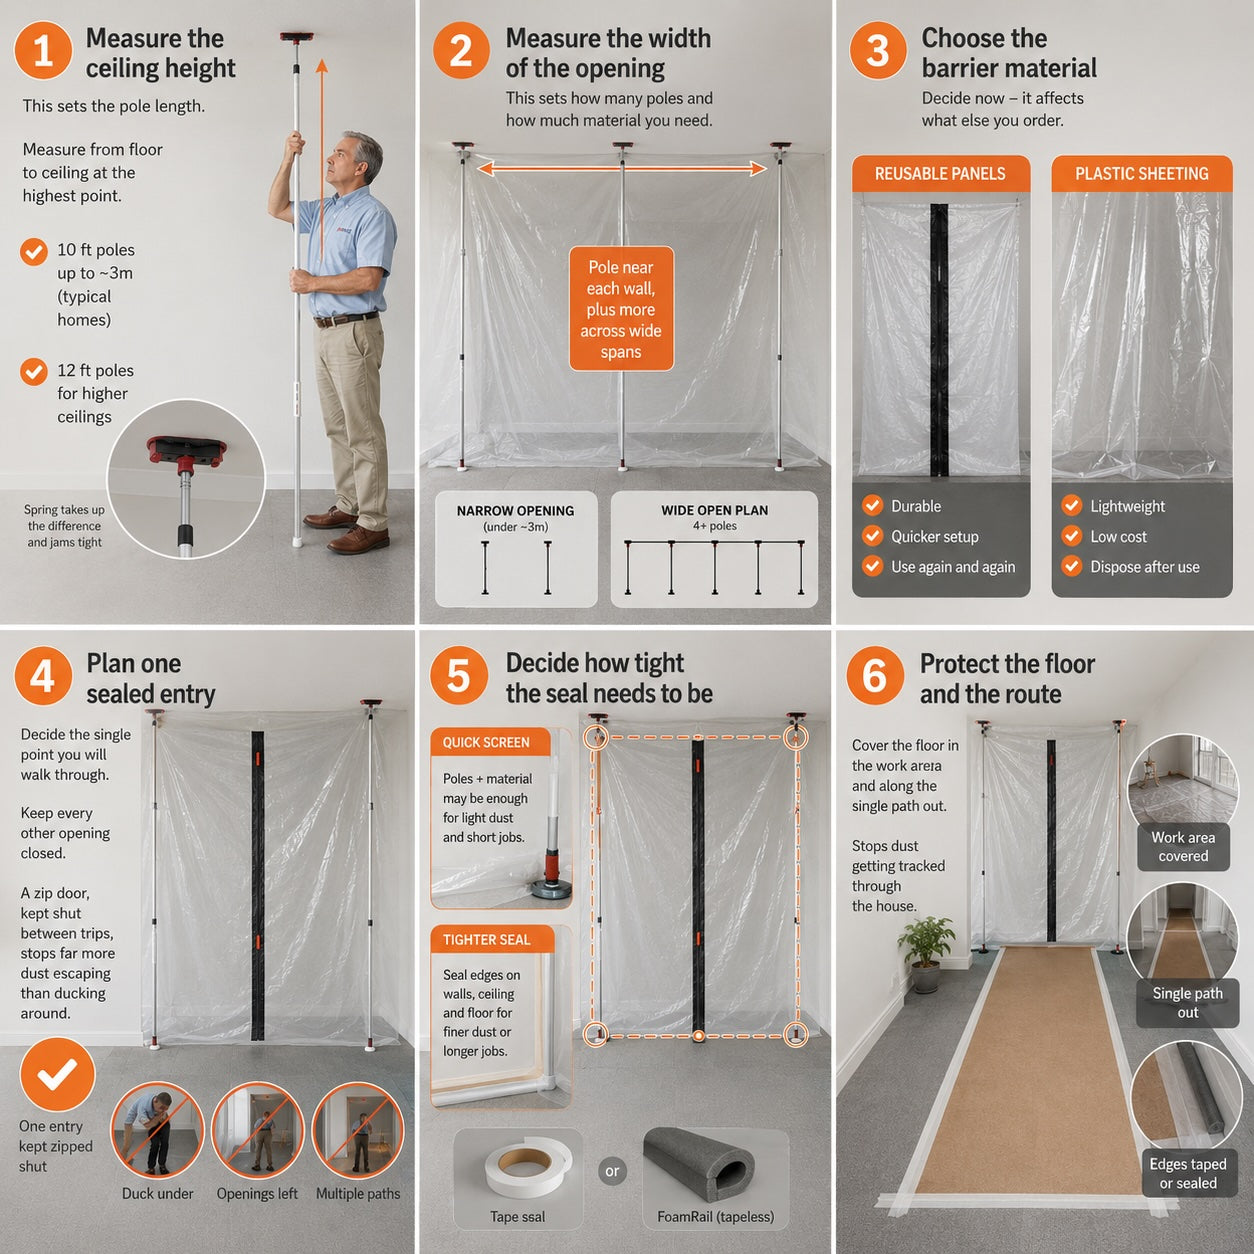
Measure the ceiling height. This sets the pole length. The spring-loaded poles adjust to fit, so the height you choose is simply the tallest ceiling the pole has to reach. The 10 foot poles cover rooms up to about 3 metres, which suits most homes, and the 12 foot poles reach higher ceilings. You do not measure to the centimetre or cut anything, the spring takes up the difference and jams the pole tight.
Measure the width of the opening. This sets how many poles and how much barrier material you need. As a rough guide a pole sits near each wall, with more poles spaced across a wide span, so a single doorway or narrow opening needs far less than an open-plan room. Two poles will close off a hallway or small room under about 3 metres wide.
Choose the barrier material. Reusable panels or plastic sheeting. The next section covers how to decide, but settle it now because it affects what else you order.
Plan one sealed entry. Decide the single point you will walk through and keep every other opening closed. A zip door on that one entry, kept shut between trips, stops far more dust escaping than a barrier people duck around.
Decide how tight the seal needs to be. For a quick screen, the poles and material may be enough. For finer dust or a longer job, plan to seal the edges along the walls, ceiling and floor, with tape or with tapeless FoamRail seals.
Protect the floor and the route. Decide how you will cover the floor in the work area and along the single path out, so the barrier is not undone by dust tracked through the house.
Reusable panels or plastic sheeting
The poles will hold up either reusable panels or ordinary plastic sheeting. The right pick depends on how often you will use it and how messy the work is.
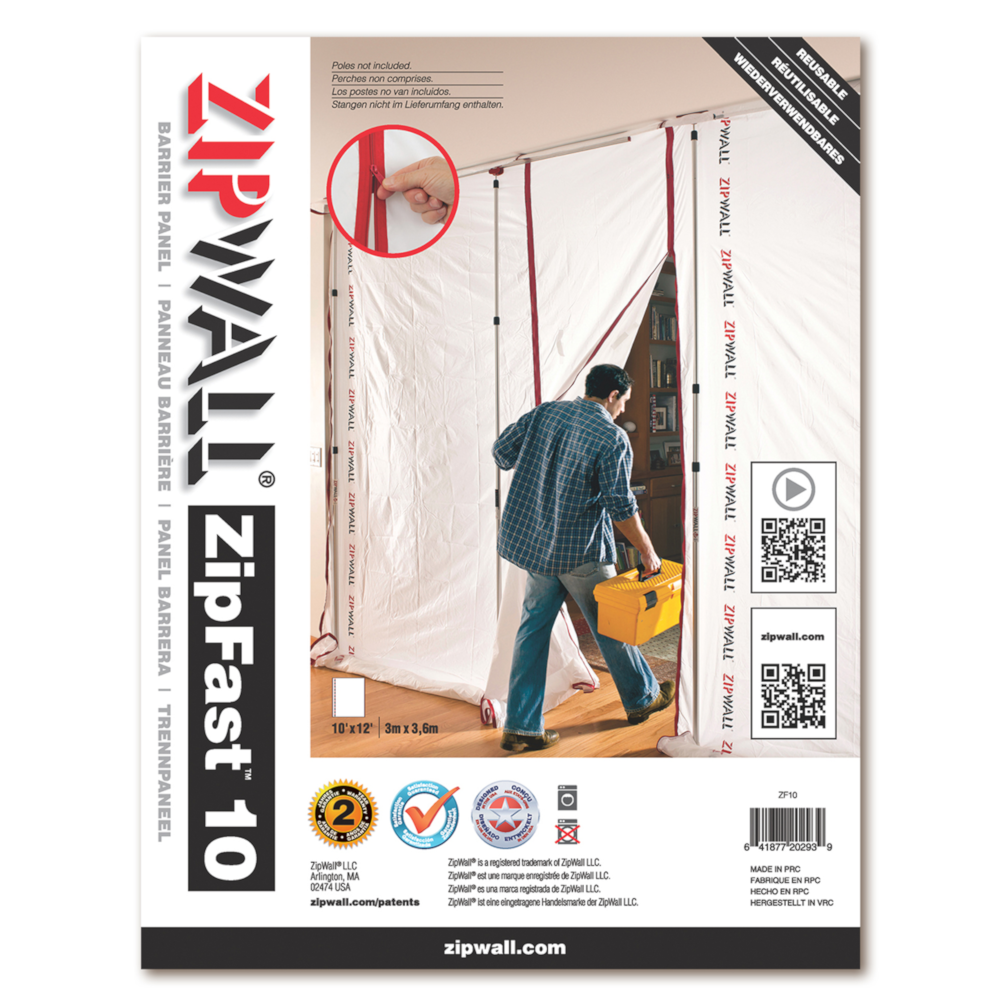
Reusable ZipFast panels. Fabric panels that hang from the poles and zip together at the seams, with one panel acting as a door. They go up and come down quickly, fold away for next time and give a tidy, semi-private screen rather than flapping plastic. The cost is higher at the outset, which it earns back over repeated jobs. The better choice if you expect to use the barrier more than once.
Plastic sheeting. Cheap, cut to any size and easy to throw away after a filthy job, so it suits heavy demolition or a one-off you would rather not keep. The trade-offs are the taping and the waste, and you need to add a zipper to make a doorway. Good when the barrier is disposable by design.
How to decide. For repeat use and a cleaner finish, panels. For a single dusty job where the barrier will be binned afterwards, sheeting. Many people keep panels for regular rooms and a roll of sheeting for the dirtiest work.
Sealing it properly
A barrier only works as well as its edges. The poles seal the sheet at top and bottom, but dust escapes through gaps along the walls, ceiling and floor, so how you close those gaps decides how much gets through.
Tape. The low-cost option, and fine for a short job. The downsides are the time it takes, the risk of marking paint or plaster when you peel it off, and that it is single use.
Tapeless FoamRail seals. Foam seals that press the barrier against the wall, ceiling or floor and hold it there without tape. They give a tighter, neater seal, leave no marks, and can be reused, which saves time on every job after the first. The FoamRail Span is an adjustable seal for spanning between surfaces.
SidePack wall mount kit. A packaged set of FoamRail seals and wall mounts that seals a barrier along two walls up to about 9 feet each. The straightforward way to add tapeless edge sealing to a pole-and-panel barrier.
Drop ceilings. Where there is a suspended or tiled ceiling, special heads let the pole seal against it cleanly. The complete toolkit includes these for exactly that situation.
To see all of this put together, the ZipWall walkthrough below runs through setting the poles up, hanging the barrier, sealing the edges without tape and adding a zip door.
Protecting the surfaces underneath
Containing airborne dust is half the job. The other half is protecting the floors and fixtures the dust would otherwise settle on or get ground into. A little good practice here saves hours of cleaning later.
Cover the floor. Lay protection film or boards over the floor in the work area and along the single route out. Hard floors scratch and carpets hold dust you cannot fully vacuum out, so cover both. DJM's wider dust protection range includes floor films alongside the ZipWall barriers.
Cover what you cannot remove. Sheet over fitted furniture, worktops and fixtures left inside the work zone. Match the cover to the risk, a light cover against dust, something sturdier where there is a chance of knocks or spills.
Keep to one pathway. Move in and out through a single route and keep movement through the rest of the house to a minimum, so dust is not walked from room to room.
Close off vents and keep the door shut. Cover air vents and extract points in the work area, and keep the zip door closed between trips. Dust travels fast through ductwork and open doors.
Clean as you go, and never sweep. Sweeping throws fine dust back into the air. Vacuum and then damp-wipe instead, working from the cleaner areas towards the dirtier ones, and tidy the work area at the end of each day so there is less to deal with at the finish.
Which setup suits you

Sealing a single doorway
For one door you still need to use, a zip door is the quickest answer. The ZipWall ZipDoor Standard kit fits a standard doorway, installs in about a minute and protects the frame with its own tape. View the ZipDoor Standard kit →

Closing off a room or wide opening
To wall off an open room or a wide opening, spring-loaded poles hold the barrier floor to ceiling without tape or a ladder. Add panels or sheeting between them. The ZipWall ZipPole poles are the starting point. View the ZipPole poles →

A tighter seal without tape
Where finer dust or a longer job calls for a tighter barrier, the ZipWall SidePack kit seals the edges against the walls without tape and without marking them, along two walls up to about 9 feet each. View the SidePack kit →

One kit for almost any job
For larger or repeat work, the ZipWall Dust Barrier Toolkit carries poles, seals, a zip door, reusable panels and zippers in one bag, enough to build and seal a barrier on all four sides. View the Dust Barrier Toolkit →
Our recommended setup
Spring-loaded poles with reusable ZipFast panels
For most home jobs this is the setup we point people to. A pair or set of spring-loaded poles holds the barrier up in seconds, and reusable ZipFast panels zip together to form the wall, with one panel serving as the door. There is no taping, no waste and nothing to cut.
It goes up and comes down quickly, folds away for the next job and gives a tidy screen rather than flapping plastic. Start with the poles and panels for a standard room, add the SidePack seals if you want the edges tighter, and step up to the complete toolkit when you are tackling larger or repeat work. View the ZipFast panels →
An independent DIY review gives a sense of how this works in a real home. One DIYer set the spring-loaded poles up while sanding drywall in a house they were still living in, and kept the dust off the furniture in the next room, the television and the kitchen surfaces stayed clean through the work. It is a US video, so the shop and prices will not match here, but it shows the poles and barrier doing their job.
How the range compares
| Product | What it does | Best suited to | Reusable |
|---|---|---|---|
| ZipDoor Standard | Seals a single doorway with a built-in zipper | A standard home doorway you still use | Yes |
| ZipDoor Commercial | Seals a doorway, flame retardant plastic | Commercial sites or where fire rules apply | Yes |
| ZipPole spring-loaded poles | Hold a barrier up floor to ceiling, no tape | Room openings and wider spans | Yes |
| ZipFast panels | Reusable barrier material that zips together | Repeat jobs and a tidy, quick screen | Yes |
| SidePack and FoamRail seals | Seal the edges against walls without tape | A tighter seal and no marks on surfaces | Yes |
| Heavy-duty zippers | Add a zip entry to plastic sheeting | Making a door in a sheeting barrier | Self-adhesive, single fit |
| Dust Barrier Toolkit | Complete kit to build and seal a barrier on four sides | Large or repeat jobs, one box for everything | Yes |
What to spend on
The right spend depends on the job in front of you and how often you expect to do it. Here is what moves the cost and where the money is well placed. Each product page shows its current price.
What drives the cost. The size of the opening sets how many poles and how much material you need, the barrier material itself is a choice between cheaper sheeting and longer-lasting reusable panels, and a tighter tapeless seal adds to the outlay. A single zip door is a small buy, a full pole-and-panel wall with sealing is more, and the complete toolkit sits at the top because it carries everything.
Spend on what your job needs. For one doorway, a zip door is all the spend required. For an open room, put the money into enough poles to span it and a barrier material you are happy with. For finer dust or a longer job, the tapeless seals are where extra spend earns its keep.
Reusable against disposable. Reusable panels and tapeless seals cost more at the outset and less over time, since you use them again and again with no tape or sheeting to buy each job. Plastic sheeting is cheaper to start and is the better value for a single dirty job you will not repeat. Match the choice to how many times you expect to set up.
Count the time you save. A barrier that goes up in minutes and seals well saves hours of cleaning at the end and lets you keep using the rest of the house during the work. That saved time and disruption is part of the value, even though it never appears on the price.
Common mistakes to avoid
Leaving the edges open
Dust escapes through the gaps along the walls, ceiling and floor, not the middle of the sheet. A barrier that is not sealed at the edges leaks, so close them with tape or tapeless FoamRail seals.
More than one way through
One sealed barrier is undone by other open doors into the work area. Pick a single entry, seal everything else, and keep the zip door shut between trips.
Taking the barrier down too soon
Cutting and sanding, especially plasterboard, throws up as much dust as the demolition did. Keep the barrier up until the dusty work is finished, not just until the walls are out.
Forgetting floors and vents
An airtight wall does not help if dust is ground into the floor or pulled through the heating. Cover the floor and the route, and close off vents in the work area.
Looking after and reusing it
Panels and poles
Wipe the panels down and let them dry before folding them away, and store the poles with the spring released. Looked after, both go up again on the next job for years.
Seals and zippers
Keep the FoamRail seals clean so they grip and seal as they should. The built-in zippers on the doors and panels reward a quick clean, while the self-adhesive add-on zippers are fitted once to sheeting and replaced when you start a fresh barrier.
Store it as a kit
Keep the parts together in their carry bag so the barrier is ready to grab next time. Half the value of a reusable system is that it is on hand the moment the next dusty job comes up.
Frequently asked questions
What is a ZipWall dust barrier and how does it work? It is a temporary wall that seals off a work area so dust stays in one room. Spring-loaded poles hold a sheet of barrier material between floor and ceiling, the edges are sealed against the walls, and a zip door lets you walk in and out while the opening stays closed. It goes up and comes down in minutes without nails, screws or a ladder.
Do the spring-loaded poles damage the ceiling or floor? They are designed not to. A spring holds the pole tight between floor and ceiling using tension rather than fixings, and non-slip pads spread the pressure at each end, so there are no holes and no tape marks. The height adjusts to the room, so you do not measure or cut.
How many poles do I need? It depends on the width of the opening. A pole sits near each wall, with more poles spaced across a wider span, so two poles will close off a hallway or small room under about 3 metres, and an open-plan room needs more. Measure the width before you buy.
Reusable panels or plastic sheeting, which should I use? Reusable panels if you expect to use the barrier more than once, since they go up quickly, leave no waste and fold away for next time. Plastic sheeting if it is a single dirty job and you would rather throw the barrier away afterwards. Many people keep both.
Do I need the flame retardant commercial door? For a home job the standard zip door is usually right. The commercial door uses flame retardant plastic and is larger, which suits commercial sites or anywhere fire rules call for it. If you are unsure whether your situation requires a flame retardant barrier, check with the site or building control.
Can I seal a barrier without using tape? Yes. Tapeless FoamRail seals and the SidePack wall mount kit press the barrier against the walls, ceiling and floor and hold it without tape, which gives a tighter seal, leaves no marks and can be reused on the next job.
How quickly will my order arrive? Orders to UK mainland are dispatched the next working day when paid before 1pm, with free delivery.
The full ZipWall range is available with free delivery to UK mainland addresses, with next working day dispatch on orders paid before 1pm. If you are not sure which parts you need for your job, get in touch and we can help you work it out.

